Chapter 2: Docker Hello, World!
Properly configuring a local development environment remains a steep challenge despite all the other advances in modern programming. There are simply too many variables: different computers, operating systems, versions of Django, virtual environment options, and so on. When you add in the challenge of working in a team environment where everyone needs to have the same set up the problem only magnifies itself.
In recent years a solution has emerged: Docker. It has quickly become the default choice for many developers working on production-level projects.
With Docker it’s finally possible to faithfully and dependably reproduce a production environment locally, everything from the proper Python version to installing Django and running additional services like a production-level database. This means it no longer matter if you are on a Mac, Windows, or Linux computer. Everything is running within Docker itself.
Docker also makes collaboration in teams exponentially easier. Gone are the days of sharing long, out-of-date README files for adding a new developer to a group project. Instead with Docker you simply share two files–a Dockerfile and docker-compose.yml file–and the developer can have confidence that their local development environment is exactly the same as the rest of the team.
Docker is not a perfect technology. It is still relatively new, complex under-the-hood, and under active development. But the promise that it aspires to–a consistent and shareable developer environment, that can be run either locally on any computer or deployed to any server–makes it a solid choice. It is also widely used among companies at this point so writing a book for “Professionals” and not covering Docker feels shortsighted.
In this chapter we’ll learn a little bit more about Docker itself and “Dockerize” our first Django project.
What is Docker?
Docker is a way to isolate an entire operating system via Linux containers which are a type of virtualization. Virtualization has its roots at the beginning of computer science when large, expensive mainframe computers were the norm. How could multiple programmers use the same single machine? The answer was virtualization and specifically virtual machines which are complete copies of a computer system from the operating system on up.
If you rent space on a cloud provider like Amazon Web Services (AWS) they are typically not providing you with a dedicated piece of hardware. Instead you are sharing one physical server with other clients. But because each client has their virtual machine running on the server, it appears to the client as if they have their own server.
This technology is what makes it possible to quickly add or remove servers from a cloud provider. It’s largely software behind the scenes, not actual hardware being changed.
What’s the downside to a virtual machine? Size and speed. A typical guest operating system can easily take up 700MB of size. So if one physical server supports three virtual machines, that’s at least 2.1GB of disk space taken up along with separate needs for CPU and memory resources.
Enter Docker. The key idea is that most computers rely on the same Linux operating system, so what if we virtualized from the Linux layer up instead? Wouldn’t that provide a lightweight, faster way to duplicate much of the same functionality? The answer is yes. And in recent years Linux containers have become widely popular. For most applications–especially web applications–a virtual machine provides far more resources than are needed and a container is more than sufficient. This, fundamentally, is what Docker is: a way to implement Linux containers!
An analogy we can use here is that of homes and apartments. Virtual Machines are like homes: stand-alone buildings with their own infrastructure including plumbing and heating, as well as a kitchen, bathrooms, bedrooms, and so on. Docker containers are like apartments: they share common infrastructure like plumbing and heating, but come in various sizes that match the exact needs of an owner.
Virtual Environments vs Containers
Virtual environments are a way to isolate Python packages. Thanks to virtual environments, one computer can run multiple projects locally. For example, Project A might use Python 3.10 and Django 4.0 among other dependencies; whereas Project B uses Python 3.5 and Django 1.11. By creating a new virtual environment for each project and installing Python packages into it, rather than globally on the computer itself, all the necessary Python packages can be maintained, managed, and updated as needed.
There are several ways to implement virtual environments but arguably the simplest is with the venv module already installed as part of the Python 3 standard library. We will use venv shortly to install Django locally on the computer.
The important distinction between virtual environments and Docker containers is that virtual environments can only isolate Python packages. They cannot isolate non-Python software like a PostgreSQL or MySQL database. And virtual environments still rely on a global, system-level installation of Python (in other words, on your computer). The virtual environment points to an existing Python installation; it does not contain Python itself.
Linux containers go a step further and isolate the entire operating system, not just the Python parts. In other words, we will install Python itself within Docker as well as install and run a production-level database.
Docker itself is a complex topic and we won’t dive that deep into it in this book, however understanding its background and key components is important. If you’d like to learn more about it, I recommend the Dive into Docker video course.
Install Docker
Ok, enough theory. Let’s start using Docker and Django together. The first step is to sign up for a free account on Docker Hub and then install the Docker desktop app on your local machine:
This download might take some time as it is a very big file! Feel free to stretch your legs at this point.
Once Docker is done installing we can confirm the correct version is running by typing the command docker --version in the command line shell. It should be at least version 18.
$ docker --version
Docker version 20.10.14, build a224086
Docker Hello, World
Docker ships with its own “Hello, World” image that is a helpful first step to run. On the command line type docker run hello-world. This will download an official Docker image and then run it within a container. We’ll discuss both images and containers in a moment.
$ docker run hello-world
Unable to find image 'hello-world:latest' locally
latest: Pulling from library/hello-world
7050e35b49f5: Pull complete
Digest: sha256:80f31da1ac7b312ba29d65080fddf797dd76acfb870e677f390d5acba9741b17
Status: Downloaded newer image for hello-world:latest

Hello from Docker!
This message shows that your installation appears to be working correctly.

To generate this message, Docker took the following steps:
 1. The Docker client contacted the Docker daemon.
 2. The Docker daemon pulled the "hello-world" image from the Docker Hub.
    (arm64v8)
 3. The Docker daemon created a new container from that image which runs the
    executable that produces the output you are currently reading.
 4. The Docker daemon streamed that output to the Docker client, which sent it
    to your terminal.

To try something more ambitious, you can run an Ubuntu container with:
 $ docker run -it ubuntu bash

Share images, automate workflows, and more with a free Docker ID:
 https://hub.docker.com/

For more examples and ideas, visit:
 https://docs.docker.com/get-started/
The command docker info lets us inspect Docker. It will contain a lot of output but focus on the top lines which show we now have 1 container which is stopped and 1 image.
$ docker info
Client:
 Debug Mode: false

Server:
 Containers: 1
  Running: 0
  Paused: 0
  Stopped: 1
 Images: 1
...
This means Docker is successfully installed and running.
Install Django
Now we will create a Django “Hello, World” project that runs locally on our computer and then move it entirely within Docker (“Dockerize it”) so you can see how all the pieces fit together.
You can save your Django code anywhere you like but for convenience we will place our code the desktop directory. The command cd (change directory) followed by the intended location works on both Windows and macOS computers to navigate to the desktop from the command line.
# Windows
$ cd onedrive\desktop
$ pwd

Path
----
C:\Users\wsv\onedrive\desktop

# macOS
$ cd desktop
$ pwd
/Users/wsv/desktop
To make a new directory use the command mkdir followed by the name. We will create one called code on the Desktop and then within it a new directory called ch2-hello.
# Windows
$ mkdir code
$ cd code
$ mkdir ch2-hello
$ cd ch2-hello

# macOS
$ mkdir code
$ cd code
$ mkdir ch2-hello
$ cd ch2-hello
To create a virtual environment within this new directory use the format python -m venv <name_of_env> on Windows or python3 -m venv <name_of_env> on macOS. Once created, a virtual environment must be activated. It is up to the developer to choose a proper environment name but a common choice is to call it .venv.
On Windows an Execution Policy must be set to enable running scripts. This is a safety precaution. The Python docs recommend allowing scripts for the CurrentUser only, which is what we will do. On macOS there are no similar restrictions on scripts so it is possible to directly run source .venv/bin/activate.
Here is what the full commands look like to create and activate a new virtual environment called .venv:
# Windows
$ python -m venv .venv
$ Set-ExecutionPolicy -ExecutionPolicy RemoteSigned -Scope CurrentUser
$ .venv\Scripts\Activate.ps1
(.venv) $

# macOS
$ python3 -m venv .venv
$ source .venv/bin/activate
(.venv) $
The shell prompt now has the environment name (.venv) prefixed which indicates that the virtual environment is active. Any Python packages installed or updated within this location will be confined to the active virtual environment.
Django is hosted on the Python Package Index (PyPI), a central repository for most Python packages. We will use pip, the most popular package installer, which comes included with Python 3.
The comparison operator ~= ensures that subsequent security updates for Django, such as 4.0.1, 4.0.2, and so on are automatically installed. Note that while it is possible to use the shorter version of pip install <package>, it is a best practice to use the longer but more explicit form of python -m pip install <package> to ensure that the correct version of Python is used. This can be an issue if you have multiple versions of Python installed on your computer.
(.venv) $ python -m pip install django~=4.0.0
You might see a WARNING message about updating pip after running these commands. It’s always good to be on the latest version of software and to remove the annoying WARNING message each time you use pip. You can copy and paste the recommended command which is as follows to be on the latest version.
(.venv) $ python -m pip install --upgrade pip
Django Hello, World
Now we can use the startproject command to create a new Django project called django_project. Adding a period, ., at the end of the command is an optional step but one many Django developers do. Without the period Django adds an additional directory to the project; with the period it does not.
We can also use the migrate command to initialize the database and start the local web server with the runserver command.
(.venv) $ django-admin startproject django_project .
(.venv) $ python manage.py migrate
(.venv) $ python manage.py runserver
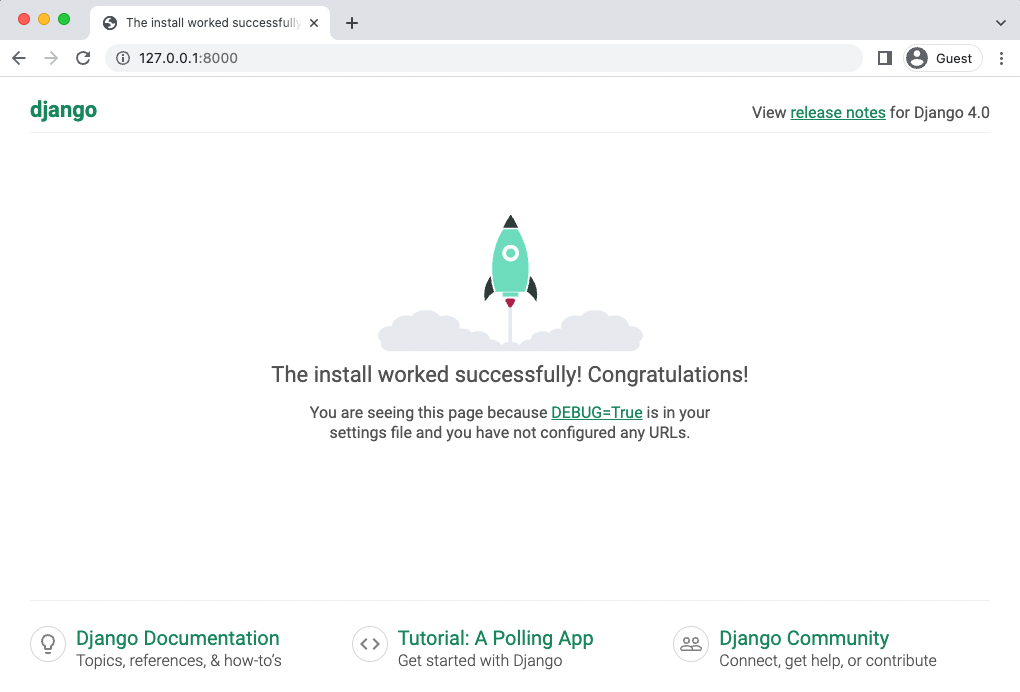
Assuming everything worked correctly you should now be able to navigate to see the Django Welcome page at http://127.0.0.1:8000/ in your web browser.
Pages App
Now we will make a simple homepage by creating a dedicated pages app for it. Stop the local server by typing Control+c and then use the startapp command appending our desired pages name.
(.venv) $ python manage.py startapp pages
Django automatically installs a new pages directory and several files for us. But even though the app has been created our django_project won’t recognize it until we add it to the INSTALLED_APPS config within the django_project/settings.py file. Django loads apps from top to bottom so generally speaking it’s a good practice to add new apps below built-in apps they might rely on such as admin, auth, and all the rest.
# django_project/settings.py
INSTALLED_APPS = [
    "django.contrib.admin",
    "django.contrib.auth",
    "django.contrib.contenttypes",
    "django.contrib.sessions",
    "django.contrib.messages",
    "django.contrib.staticfiles",
    # Local
    "pages.apps.PagesConfig",  # new
]
Now we can set the URL route for the pages app. Since we want our message to appear on the homepage we’ll use the empty string "". Don’t forget to add the include import on the second line as well.
# django_project/urls.py
from django.contrib import admin
from django.urls import path, include  # new

urlpatterns = [
    path("admin/", admin.site.urls),
    path("", include("pages.urls")),  # new
]
Rather than set up a template at this point we can just hardcode a message in our view layer at pages/views.py which will output the string “Hello, World!”.
# pages/views.py
from django.http import HttpResponse


def home_page_view(request):
    return HttpResponse("Hello, World!")
What’s next? Our last step is to create a urls.py file within the pages app and link it to home_page_view. Do so now with your text editor. Then in the new file pages/urls.py import path on the top line, add the home_page_view, and then set its route to again be the empty string of "". Note that we also provide an optional name, home, for this route which is a best practice.
# pages/urls.py
from django.urls import path

from .views import home_page_view

urlpatterns = [
    path("", home_page_view, name="home")
]
The full flow of our Django homepage is as follows:
- when a user goes to the homepage they will first be routed to
django_project/urls.py - then routed to
pages/urls.py - and finally directed to the
home_page_viewwhich returns the string “Hello, World!”
Our work is done for a basic homepage. Start up the local server again.
(.venv) $ python manage.py runserver
If you refresh the web browser at http://127.0.0.1:8000/ it will now output our desired message.

The last step is to create a requirements.txt file containing a record of all Python packages currently installed in our virtual environment. The command pip freeze will output the contents of your current virtual environment and by using the > operator we can do all this in one step: output the contents into a new file called requirements.txt. If your server is still running enter Ctrl+c and Enter to exit before entering this command.
(.venv) $ pip freeze > requirements.txt
A new requirements.txt file will be created. It should contain Django as well as the packages asgiref and sqlparse which are automatically included when Django is installed.
asgiref==3.5.2
Django==4.0.4
sqlparse==0.4.2
Now it’s time to switch to Docker. Exit our virtual environment since we no longer need it by typing deactivate and Return.
(.venv) $ deactivate
$
How do we know the virtual environment is no longer active? There will no longer be parentheses around the directory name on the command line prompt. Any normal Django commands you try to run at this point will fail. For example, try python manage.py runserver to see what happens.
$ python manage.py runserver
...
ModuleNotFoundError: No module named 'django'
This means we’re fully out of the virtual environment and ready for Docker.
Docker Image
A Docker image is a read-only template that describes how to create a Docker container. The image is the instructions while the container is the actual running instance of an image. To continue our apartment analogy from earlier in the chapter, an image is the blueprint or set of plans for building an apartment; the container is the actual, fully-built building.
Images are often based on another image with some additional customization. For example, there is a long list of officially supported images for Python depending on the version and flavor of Python desired.
Dockerfile
For our Django project we need to create a custom image that contains Python but also installs our code and has additional configuration details. To build our own image we create a special file known as a Dockerfile that defines the steps to create and run the custom image.
Use your text editor to create a new Dockerfile file in the project-level directory next to the manage.py file. Within it add the following code which we’ll walk through line-by-line below.
# Pull base image
FROM python:3.10.4-slim-bullseye

# Set environment variables
ENV PIP_DISABLE_PIP_VERSION_CHECK 1
ENV PYTHONDONTWRITEBYTECODE 1
ENV PYTHONUNBUFFERED 1

# Set work directory
WORKDIR /code

# Install dependencies
COPY ./requirements.txt .
RUN pip install -r requirements.txt

# Copy project
COPY . .
Dockerfiles are read from top-to-bottom when an image is created. The first instruction is a FROM command that tells Docker what base image we would like to use for our application. Docker images can be inherited from other images so instead of creating our own base image, we’ll use the official Python image that already has all the tools and packages that we need for our Django application. In this case we’re using Python 3.10.4 and the much smaller in size slim variant that does not contain the common packages contained in the default tag. The tag bullseye refers to the latest stable Debian release. It is a good idea to set this explicitly to minimize potential breakage when there are new releases of Debian.
Then we use the ENV command to set three environment variables:
PIP_DISABLE_PIP_VERSION_CHECKdisables an automatic check forpipupdates each timePYTHONDONTWRITEBYTECODEmeans Python will not try to write.pycfilesPYTHONUNBUFFEREDensures our console output is not buffered by Docker
The command WORKDIR is used to set a default working directory when running the rest of our commands. This tells Docker to use this path as the default location for all subsequent commands. As a result, we can use relative paths based on the working directory rather than typing out the full file path each time. In our case the working directory is /code but it can often be much longer and something like /app/src, /usr/src/app, or similar variations depending upon the specific needs of a project.
The next step is to install our dependencies with pip and the requirements.txt file we already created. The COPY command takes two parameters: the first parameter tells Docker what file(s) to copy into the image and the second parameter tells Docker where you want the file(s) to be copied to. In this case we are copying the existing requirements.txt file from our local computer into the current working directory which is represented by ..
Once the requirements.txt file is inside the image we can use our last command, RUN, to execute pip install. This works exactly the same as if we were running pip install locally on our machine, but this time the modules are installed into the image. The -r flag tells pip to open a file–called requirements.txt here–and install its contents. If we did not include the -r flag pip would try and fail to install requirements.txt since it isn’t itself an actual Python package.
At the moment we have a new image based on the slim-bullseye variant of Python 3.10.4 and have installed our dependencies. The final step is to copy all the files in our current directory into the working directory on the image. We can do this by using the COPY command. Remember it takes two parameters so we’ll copy the current directory on our local filesystem (.) into the working directory (.) of the image.
If you’re confused right now don’t worry. Docker is a lot to absorb but the good news is that the steps involved to “Dockerize” an existing project are very similar.
.dockerignore
A .dockerignore file is a best practice way to specify certain files and directories that should not be included in a Docker image. This can help reduce overall image size and improves security by keeping things that are meant to be secret out of Docker.
At the moment we can safely ignore the local virtual environment (.venv), our future .git directory, and a .gitignore file. In your text editor create a new file called .dockerignore in the base directory next to the existing manage.py file.
.venv
.git
.gitignore
We now have our complete instructions for creating a custom image but we haven’t actually built it yet. The command to do this is unsurprisingly docker build followed by the period, ., indicating the Dockerfile is located in the current directory. There will be a lot of output here. I’ve only included the first two lines and the last one.
$ docker build .
[+] Building 9.1s (10/10) FINISHED
 => [internal] load build definition from Dockerfile
...
=> => writing image sha256:89ede1...
docker-compose.yml
Our fully-built custom image is now available to run as a container. In order to run the container we need a list of instructions in a file called docker-compose.yml. With your text editor create a docker-compose.yml file in the project-level directory next to the Dockerfile. It will contain the following code.
version: "3.9"
services:
  web:
    build: .
    ports:
      - "8000:8000"
    command: python manage.py runserver 0.0.0.0:8000
    volumes:
      - .:/code
On the top line we set the most recent version of Docker Compose which is currently 3.9. Then we specify which services (or containers) we want to have running within our Docker host. It’s possible to have multiple services running, but for now we just have one for web.
Within web we set build to look in the current directory for our Dockerfile. We’ll use the Django default ports of 8000 and execute the command to run the local web server. Finally the volumes mount automatically syncs the Docker filesystem with our local computer’s filesystem. This if we make a change to the code within Docker it will automatically be synced with the local filesystem.
The final step is to run our Docker container using the command docker-compose up. This command will result in another long stream of output code on the command line.
$ docker-compose up
[+] Building .4s (10/10) FINISHED
 => [internal] load build definition from Dockerfile
...
Attaching to docker-web-1
docker-web-1  | Watching for file changes with StatReloader
docker-web-1  | Performing system checks...
docker-web-1  |
docker-web-1  | System check identified no issues (0 silenced).
docker-web-1  | May 16, 2022 - 18:08:08
docker-web-1  | Django version 4.0.4, using settings 'django_project.settings'
docker-web-1  | Starting development server at http://0.0.0.0:8000/
docker-web-1  | Quit the server with CONTROL-C.
To confirm it actually worked, go back to http://127.0.0.1:8000/ in your web browser. Refresh the page and the “Hello, World” page should still appear.
Django is now running purely within a Docker container. We are not working within a virtual environment locally. We did not execute the runserver command. All of our code now exists and our Django server is running within a self-contained Docker container. Success!
We will create multiple Docker images and containers over the course of this book and with practice the flow will start to make more sense.:
- create a
Dockerfilewith custom image instructions - add a
.dockerignorefile - build the image
- create a
docker-compose.ymlfile - spin up the container(s)
Stop the currently running container with Control+c (press the “Control” and “c” button at the same time) and additionally type docker-compose down. Docker containers take up a lot of memory so it’s a good idea to stop them when you’re done using them. Containers are meant to be stateless which is why we use volumes to copy our code over locally where it can be saved.
$ docker-compose down
[+] Running 2/0
 ⠿ Container docker-web-1  Removed
 ⠿ Network docker_default  Removed
 $
Whenever any new technology is introduced there are potential security concerns. In Docker’s case, one example is that it sets the default user to root. The root user (also known as the “superuser” or “admin”) is a special user account used in Linux for system administration. It is the most privileged user on a Linux system and has access to all commands and files.
The Docker docs contain a section a large section on Security and specifically on rootless mode to avoid this. We will not be covering it here since this is a book on Django, not Docker, but especially if your website stores sensitive information do review the entire Security section closely before going live.
Git
Git is the version control system of choice these days and we’ll use it in this book. Initialize a new repository with git init and run git status to see which files/directories will be tracked.
$ git init
$ git status
Before making our first commit it is always a good idea to create a .gitignore file in the project root directory. We will include our virtual environment directory, .venv, the pycache folder, the local database db.sqlite3, and if on macOS .DS_Store.
.venv
__pycache__/
db.sqlite3
.DS_Store  # Mac only
If you run git status again it should show the following:
$ git status
.......
Both the database and virtual environment are not ignored by Git. Go ahead and add all current files to Git and create our first commit and message.
$ git add .
$ git commit -m 'ch2-hello'
You can compare your code for this chapter with the official repository available on Github.
Conclusion
Docker is a self-contained environment that includes everything we need for local development: web services, databases, and more if we want. The general pattern will always be the same when using it with Django:
- create a new virtual environment and install Django
- create a new Django project within it
- write a
Dockerfileand build the initial image - write a
docker-compose.ymlfile and run the container withdocker-compose up
We will build several more Django projects with Docker so this flow makes more sense, but that’s really all there is to it. In the next chapter we’ll create a new Django project using Docker and add PostgreSQL in a separate container as our database.