Chapter 3: PostgreSQL
One of the most immediate differences between working on a “toy app” in Django and a production-ready one is the database. Django ships with SQLite as the default choice for local development because it is small, fast, and file-based which makes it easy to use. No additional installation or configuration is required.
However this convenience comes at a cost. Generally speaking SQLite is not a good database choice for professional websites. So while it is fine to use SQLite locally while prototyping an idea, it is rare to actually use SQLite as the database on a production project.
Django ships with built-in support for five databases: PostgreSQL, MariaDB, MySQL, Oracle, and SQLite. We’ll be using PostgreSQL in this book as it is the most popular choice for Django developers, however, the beauty of Django’s ORM (Object-Relational-Mapper) is that even if we wanted to use MySQL, MariaDB, or Oracle the actual Django code we write will be almost identical. The Django ORM handles the translation from Python code to SQL configured for each database automatically for us which is quite amazing if you think about it.
The challenge of using non-file based databases is that they must be installed and run locally if you want to faithfully mimic a production environment on your own computer. And we do want that! While Django handles the details of switching between databases for us there are inevitably small, hard-to-catch bugs that can crop up if you use SQLite for local development but a different database in production. Therefore a best practice is to use the same database locally and in production.
In this chapter we’ll start a new Django project with a SQLite database and then switch over to both Docker and PostgreSQL.
Django Set Up
On the command line make sure you’ve navigated back to the code folder on our desktop. You can do this two ways. Either type cd .. to move “up” a level so if you are currently in Desktop/code/hello you will move to Desktop/code. Or you can simply type cd onedrive\desktop on Windows or cd ~/desktop/code on macOS which will take you directly to the code directory. Then create a new directory called ch3-postgresql for this chapter’s code.
# Windows
$ cd onedrive\desktop
$ mkdir ch3-postgresql

# macOS
$ cd ~/desktop/code
$ mkdir ch3-postgresql
We will follow the standard steps for creating a new Django project: make a dedicated virtual environment, activate it, and install Django.
# Windows
$ python -m venv .venv
$ Set-ExecutionPolicy -ExecutionPolicy RemoteSigned -Scope CurrentUser
$ .venv\Scripts\Activate.ps1
(.venv) $ python -m pip install django~=4.0.0

# macOS
$ python3 -m venv .venv
$ source .venv/bin/activate
(.venv) $ python3 -m pip install django~=4.0.0
Next we can create a new project called django_project, migrate our database to initialize it, and use runserver to start the local server.
(.venv) $ django-admin startproject django_project .
(.venv) $ python manage.py migrate
(.venv) $ python manage.py runserver
Normally I don’t recommend running migrate on new projects until after a custom user model has been configured. Otherwise Django will bind the database to the built-in User model which is difficult to modify later on in the project. We’ll cover this properly in the next chapter but since this chapter is primarily for demonstration purposes, using the default User model here is a one-time exception.
Confirm everything worked by navigating to http://127.0.0.1:8000/ in your web browser. You may need to refresh the page but should see the familiar Django welcome page.
The last step before switching over to Docker is creating a requirements.txt file using the command we learned in the previous chapter.
(.venv) $ pip freeze > requirements.txt
This will generate a new requirements.txt file containing the pinned contents of our current virtual environment.
Docker
To switch over to Docker first deactivate our virtual environment and then in your text editor create new Dockerfile and docker-compose.yml files which will control our Docker image and container respectively.
(.venv) $ deactivate
$
The Dockerfile is the same as in Chapter 1.
# Pull base image
FROM python:3.10.4-slim-bullseye

# Set environment variables
ENV PIP_DISABLE_PIP_VERSION_CHECK 1
ENV PYTHONDONTWRITEBYTECODE 1
ENV PYTHONUNBUFFERED 1

# Set work directory
WORKDIR /code

# Install dependencies
COPY ./requirements.txt .
RUN pip install -r requirements.txt

# Copy project
COPY . .
Before building the image make sure to create a .dockerignore file.
.venv
.git
.gitignore
Notice that if you build the initial image using the docker build . command it is much, much faster than the previous chapter.
$ docker build .
...
---> Using cache
That’s because whenever you build a new Dockerfile, Docker will automatically check if it can use the cached results of previous builds. And since this Dockerfile is the same as the one from Chapter 1 everything is the same except for the final COPY command that syncs local files with those on the container’s filesystem.
This caching means that the order of a Dockerfile is important for performance reasons. In order to avoid constantly invalidating the cache we start the Dockerfile with commands that are less likely to change while putting commands that are more likely to change, like COPYing the local filesystem, at the end.
Time now for the docker-compose.yml file which also matches what we saw previously in Chapter 1.
version: "3.9"

services:
  web:
    build: .
    command: python /code/manage.py runserver 0.0.0.0:8000
    volumes:
      - .:/code
    ports:
      - 8000:8000
Detached Mode
We’ll start up our container now but this time in detached mode which requires either the -d or -detach flag (they do the same thing).
$ docker-compose up -d
Detached mode runs containers in the background, which means we can use a single command line tab without needing a separate one open as well. This saves us from switching back and forth between two command line tabs constantly. The downside is that if/when there is an error, the output won’t always be visible. So if your screen does not match this book at some point, try typing docker-compose logs to see the current output and debug any issues.
You likely will see a “Warning: Image for service web was built because it did not already exist” message at the bottom of the command. Docker automatically created a new image for us within the container. As we’ll see later in the book, adding the --build flag to force an image build is necessary when software packages are updated because, by default, Docker will look for a local cached copy of software and use that which improves performance.
To confirm things are working properly go back to http://127.0.0.1:8000/ in your web browser. Refresh the page to see the Django welcome page again.
Since we’re working within Docker now as opposed to locally we must preface traditional commands with docker-compose exec [service] where we specify the name of the service. For example, to create a superuser account instead of typing python manage.py createsuperuser the updated command would now look like the line below, using the web service.
$ docker-compose exec web python manage.py createsuperuser
Note: If you are on a newer M1-based macOS computer it’s possible this command will yield the following cryptic error: django.db.utils.OperationalError: SCRAM authentication requires libpq version 10 or above. Currently there is a bug upstream in libpg that’s building against the wrong library version on ARM. The fix is to update the first line of your Dockerfile to specify the proper local platform by adding --platform=linux/amd64 to the initial FROM command that installs Python.
# Pull base image
FROM --platform=linux/amd64 python:3.10.4-slim-bullseye
...
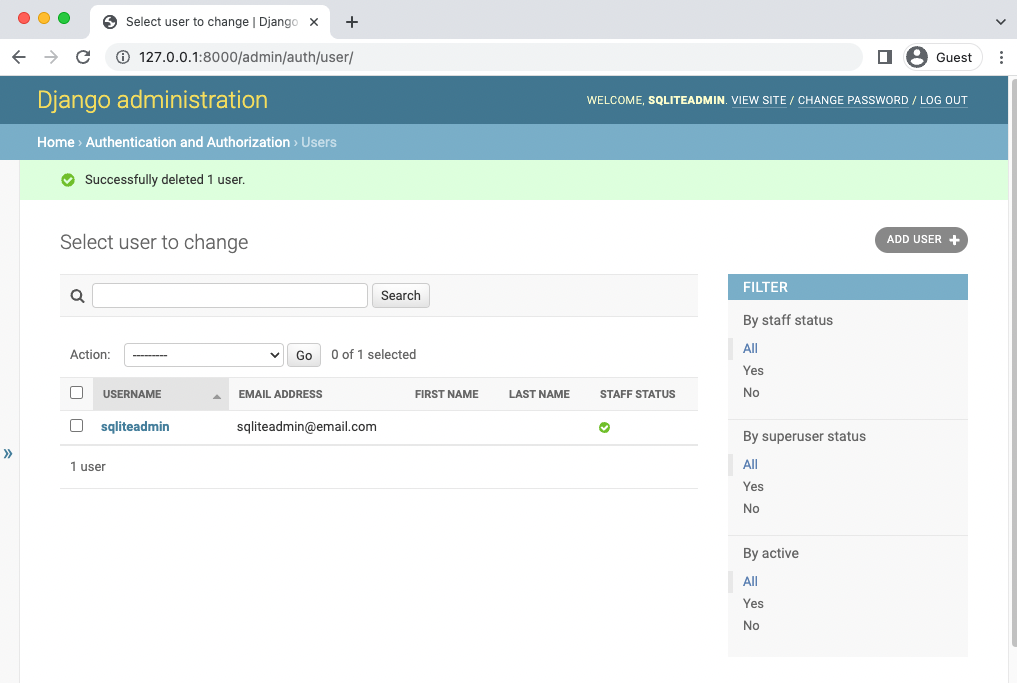
For the username choose sqliteadmin, sqliteadmin@email.com as the email address, and select the password of your choice. I often use testpass123.
Then navigate directly into the admin at http://127.0.0.1:8000/admin and log in. You will be redirected to the admin homepage. Note in the upper right corner sqliteadmin is the username.

Django has impressive support for multiple languages so if you’d like to see the Admin, forms, and other default messages in language other than English, try adjusting the LANGUAGE_CODE configuration in django_project/settings.py which is automatically set to American English, en-us.
Moving along, if you click on the Users button it takes us to the Users page where we can confirm only one user has been created.
It’s important to highlight another aspect of Docker at this point: so far we’ve been updating our database–currently represented by the db.sqlite3 file–within Docker. That means the actual db.sqlite3 file is changing each time. And thanks to the volumes mount in our docker-compose.yml config each file change has been copied over into a db.sqlite3 file on our local computer too. You could quit Docker, start the shell, start the server with python manage.py runserver, and see the exact same admin login at this point because the underlying SQLite database is the same.
PostgreSQL
PostgreSQL is a database that can be used by almost any programming language. But if you think about it, how does a programming language–and they all vary in some way or another–connect to the database itself?
The answer is via a database adapter! And that’s what Psycopg is, the most popular database adapter for Python. If you’d like to learn more about how Psycopg works here is a link to a fuller description on the official site.
Psycopg 3.0 was recently released but many packages and hosting providers are still focused on Psycopg2 so that’s what we’ll use. Note that there are actually two versions of Pyscopg2 available: pyscopg2 and pyscopg2-binary. We will use the binary version in this book because it is simpler to use and works just fine for most websites. Using the non-binary version requires multiple additional steps of configuration and is only relevant to truly massive websites. If way down the line you find slowness with your database, investigating pyscopg2 vs psycopg2-binary is a worthy use of time. But starting out it is not.
To install it first stop running the Docker container with docker-compose down.
$ docker-compose down
It’s important to pause right now and think about what it means to install a package into Docker as opposed to a local virtual environment. In a traditional project we’d run the command python -m pip install psycopg2-binary==2.9.3 from the command line to install Pyscopg2. But we’re working with Docker now.
There are two options. The first is to install psycopg2-binary locally and then pip freeze our virtual environment to update requirements.txt. If we were going to use the local environment this might make sense. But since we are committed to Docker we can skip that step and instead just update requirements.txt with the psycopg2-binary package. We don’t need to update the actual virtual environment further because it is unlikely we’ll be using it. And if we ever did we can just update it based on requirements.txt anyway.
In your text editor open the existing requirements.txt file and add psycopg2-binary==2.9.3 to the bottom.
asgiref==3.5.2
Django==4.0.4
sqlparse==0.4.2
psycopg2-binary==2.9.3
At the end of our PostgreSQL configuration changes we will build the new image and spin up our containers. But not yet.
docker-compose.yml
In the existing docker-compose.yml file add a new service called db. This means there will be two separate containers running within our Docker host: web for the Django local server and db for our PostgreSQL database.
The web service depends on the db service to run so we’ll add a line called depends_on to web signifying this.
Within the db service we specify which version of PostgreSQL to use. As of this writing, Heroku supports version 13 as the latest release so that is what we will use. Docker containers are ephemeral meaning when the container stops running all information is lost. This would obviously be a problem for our database! The solution is to create a volumes mount called postgres_data and then bind it to a dedicated directory within the container at the location /var/lib/postgresql/data/. The final step is to add a trust authentication to the environment for the db. For large databases with many database users it is recommended to be more explicit with permissions, but this setting is a good choice when there is just one developer.
Here is what the updated file looks like:
version: "3.9"

services:
  web:
    build: .
    command: python /code/manage.py runserver 0.0.0.0:8000
    volumes:
      - .:/code
    ports:
      - 8000:8000
    depends_on:
      - db
  db:
    image: postgres:13
    volumes:
      - postgres_data:/var/lib/postgresql/data/
    environment:
      - "POSTGRES_HOST_AUTH_METHOD=trust"

volumes:
  postgres_data:
DATABASES
The third and final step is to update the django_project/settings.py file to use PostgreSQL and not SQLite. Within your text editor scroll down to the DATABASES config.
By default Django specifies sqlite3 as the database engine, gives it the name db.sqlite3, and places it at BASE_DIR which means in our project-level directory.
# django_project/settings.py
DATABASES = {
    "default": {
        "ENGINE": "django.db.backends.sqlite3",
        "NAME": BASE_DIR / "db.sqlite3",
    }
}
To switch over to PostgreSQL we will update the ENGINE configuration. PostgreSQL requires a NAME, USER, PASSWORD, HOST, and PORT. For convenience we’ll set the first three to postgres, the HOST to db which is the name of our service set in docker-compose.yml, and the PORT to 5432 which is the default PostgreSQL port.
# django_project/settings.py
DATABASES = {
    "default": {
        "ENGINE": "django.db.backends.postgresql",
        "NAME": "postgres",
        "USER": "postgres",
        "PASSWORD": "postgres",
        "HOST": "db",  # set in docker-compose.yml
        "PORT": 5432,  # default postgres port
    }
}
And that’s it! We can build our new image containing psycopg2-binary and spin up the two containers in detached mode with the following single command:
$ docker-compose up -d --build
If you refresh the Django welcome page at http://127.0.0.1:8000/ it should work which means Django has successfully connected to PostgreSQL via Docker.
New Database
Since we are using PostgreSQL now, not SQLite, our database is empty. If you look at the current logs again by typing docker-compose logs you’ll see complaints like “You have 18 unapplied migrations(s)”.
To reinforce this point visit the Admin at http://127.0.0.1:8000/admin/ and log in. Will our previous superuser account of sqliteadmin and testpass123 work?
Nope! We see ProgrammingError at /admin. To fix this situation, we can both migrate and create a superuser within Docker that will access the PostgreSQL database.
$ docker-compose exec web python manage.py migrate
$ docker-compose exec web python manage.py createsuperuser
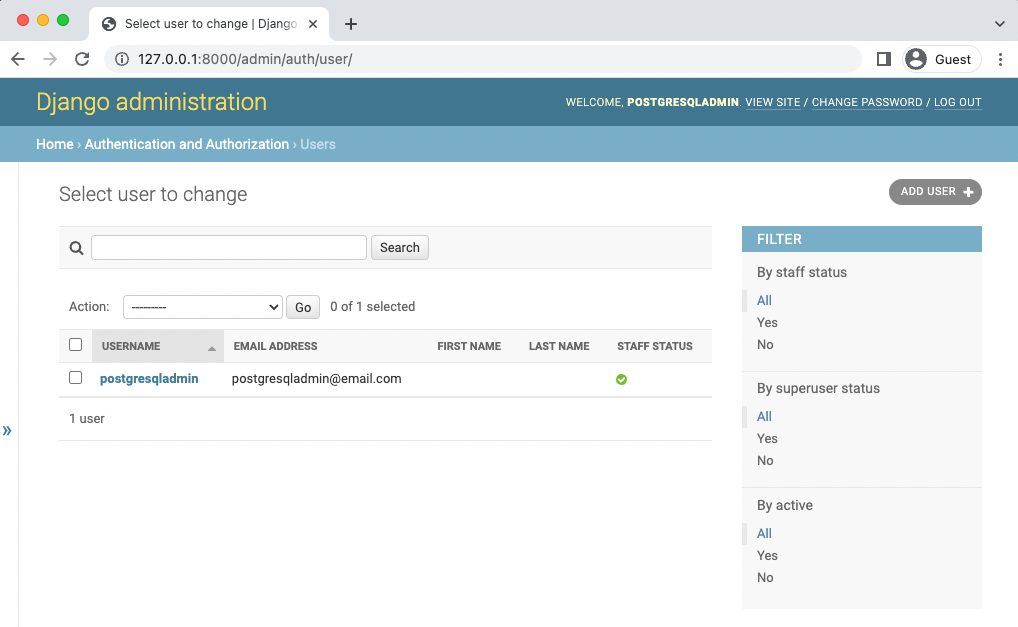
What should we call our superuser? Let’s use postgresqladmin and for testing purposes set the email to postgresqladmin@email.com and the password to testpass123.
In your web browser navigate to the admin page at http://127.0.0.1:8000/admin/ and enter in the new superuser log in information.
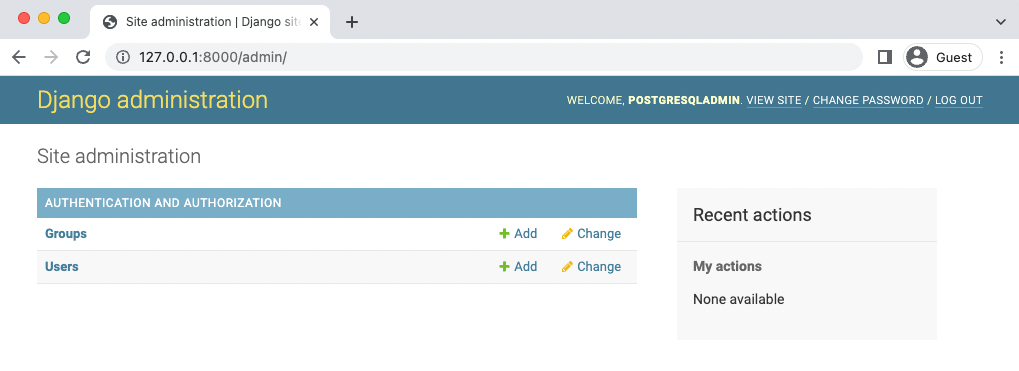
In the upper right corner it shows that we are logged in with postgresadmin now not sqliteadmin. Also, you can click on the Users tab on the homepage and visit the Users section to see our one and only user is the new superuser account.
Remember to stop our running container with docker-compose down.
$ docker-compose down
Git
Let’s save our changes with Git. Initialize a new Git repository and check the current status.
$ git init
$ git status
Before creating the first commit it is always a good idea to add a .gitignore file to the project root directory. Ours will have four lines right now.
.venv
__pycache__/
db.sqlite3
.DS_Store  # Mac only
Use git status again to check that both are no longer being tracked by Git and then add all other changes and include a commit message.
$ git status
$ git add .
$ git commit -m 'ch3'
The official source code for Chapter 3 is available on Github.
Conclusion
The goal of this chapter was to demonstrate how Docker and PostgreSQL work together on a Django project. Switching between a SQLite database and a PostgreSQL is a mental leap for many developers initially.
The key point is that with Docker we don’t need to be in a local virtual environment anymore. Docker is our virtual environment…and our database and more if desired. The Docker host essentially replaces our local operating system and within it we can run multiple containers, such as for our web app and for our database, which can all be isolated and run separately.
In the next chapter we will start our online Bookstore project. Let’s begin!
This concludes the free sample chapters of the book. There are 16 more…
The complete book features 20 chapters and builds an online bookstore from scratch with robust user registration, environment variables, permissions, search, security and performance improvements, and deployment.